- Navigate to ENCORE at norfolkcounty.perfectmind.com.
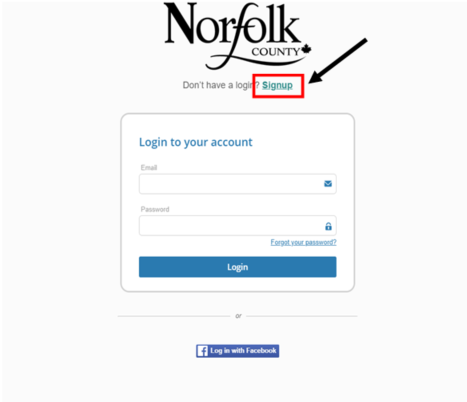
- Select ‘Signup’ directly under the Norfolk County logo.
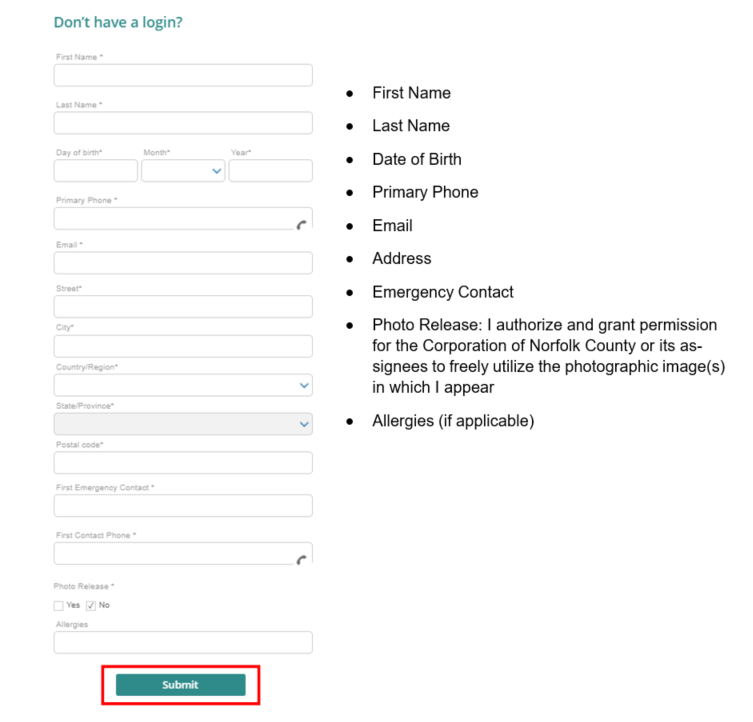
- Fill out all required information. When you’re done, select ‘Submit’.
- Your new account has been created, and you will be directed to your account profile.
- You will receive an email with a temporary password.
- Click the link in your email.
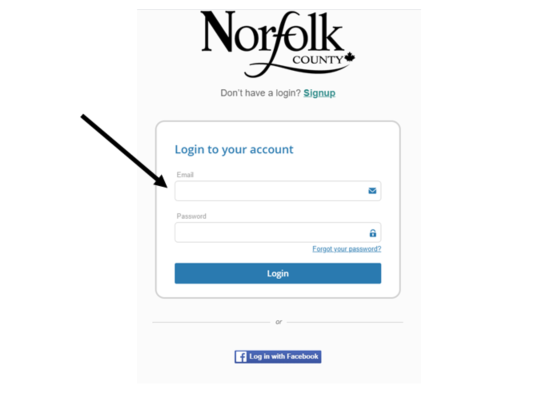
- Enter your email address and the temporary Click Login.
- You will be prompted to enter a new password. Do so and click Save. Your new account is now complete.
ENCORE Registration System
ENCORE is Norfolk County’s online registration system for recreation programs, the Gear Shop, and more. Encore runs on software called xplor®.
Login to ENCORE
Already have an account?
Log in to ENCORE to register for programs, pre-register for drop-in activities, rent great, purchase memberships and gift cards.
ENCORE quicklinks
Please use the Google Chrome browser to access all features of the ENCORE registration system. Download Google Chrome.
Step-by-step guides to using ENCORE
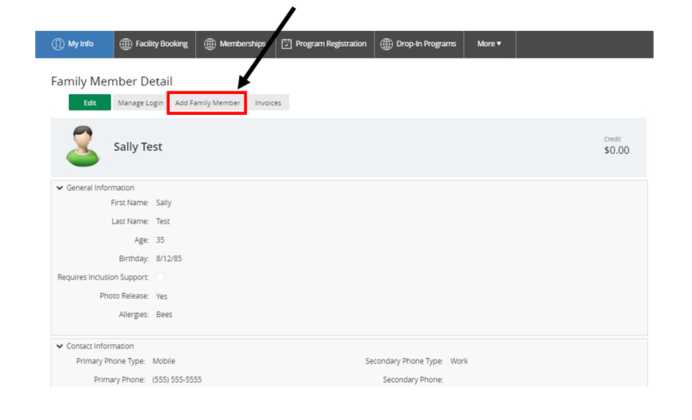
- From your account profile, you can add additional family members by selecting the ‘Add Family Member’ button.
- Fill out all required information, then click ‘Submit’
- The Contact Relation field refers to how the family member is related to you (the primary account member)
- Repeat this process for each family member you would like to add.
- Navigate to ENCORE
- Enter your email and password, then click ‘Login’
Note: If you don’t have an account, please see Create an Account and Adding Family Members above
3. Once logged in, you will be directed to your account
4. Select the Program Registration button located at the top of the screen
5. This will take you to the Program Registration From this page, you are able to search for programs by keywords, location, service, date, day of week, and age
6. OR you can select the category you’re interested in (for example, School Aged Lessons under Aquatics)
7. You will now see all courses available under this category
8. Once you find the course you’re looking for (for example, Swimmer 1), select Show Courses under the description
9. All available courses will be You will see the age range, day of week, time, date range, price, and remaining spots left for each
10. Once you have found the course you are interested in, select Register Now
11. This will bring you to the course page, which shows:
-
- Remaining spots
- Fees
- Course dates and times
- Location
- Registration end date
- Course Description
- Course ID
- Age restrictions
- *Select Show Map to get directions to the location
12. Select Register Now to start the registration process
13. Select the checkbox next to the family member you would like to register in the course
Note: you can add additional family members from this screen by selecting Add Family Member
14. Select Next
15. You will now be able to review your registration
-
- Select Modify Booking to make changes, if necessary
- Select Book Another Event to add additional items to your cart
16. Select Checkout when all necessary items have been added
17. Select a credit card on file, or enter a new credit card
-
- Note: if you have available credit on your account you can use this to pay as well
18. Select Place My Order to complete transaction
19. You can now print your Registration Confirmation and/or Receipt, book another event, or add the event to your calendar (Apple Calendar, Google, Outlook, or Yahoo)
Waitlists
- If a program is full, you can add the registrant to the waitlist
- Instead of saying Register Now, it will say Waitlist
- Instead of saying Register Now, it will say Waitlist
- Select the Waitlist button
- Select the registrant you would like to waitlist
- Select the Waitlist Button
- The registrant is now on the You will receive an email if a spot becomes available
1. Navigate to ENCORE at norfolkcounty.perfectmind.com Note: Our system works best with Google Chrome
2 .Enter your email and password, then click ‘Login’
Note: If you don’t have an account, please see our Creating an Account & Adding Family Members document
3. Once logged in, you will be directed to your account
4 .Select the Drop-In Programs button located at the top of the screen
5. This will take you to the Drop-In Programs page. From this page you are able to search for drop-ins by keywords, location, service, date, day of week and age
6. OR select the category you’re interested in (for example Pickleball)
7. You will now see all available drop-in programs under this category
8. You can narrow down your search, if needed, by using the filtering on the left-hand side (age, service and day of week)
9. Select the Register Now button on the drop-in program you would like to at-tend
10. This will bring you to the drop-in registration page, which shows:
Remaining spots
Fees
Future drop-ins
Location
Registration end date
Course Description
Course ID
Age restrictions
*Select Show Map to get directions to the location
11. Select Register Now to start the registration process
12. Select the checkbox next to the family member(s) you would like to register in the drop-in
Note: you can add additional family members from this screen by selecting Add Family Member
13. Select Next
14. You will now be directed to the checkout
DROP-IN PROGRAMS
15. Select a credit card on file or enter a new credit card
Note: if you have available credit on your account, you can use this to pay as well
16. Select Place My Order to complete transaction
17. You can print your Registration Confirmation and/or Receipt, book another event, or add the event to your calendar (Apple Calendar, Google, Outlook, or Yahoo)
DROP-IN PROGRAMS
Waitlists
1. If a drop-in is full, you can add the registrant to the waitlist
Instead of saying Register Now, it will say Waitlist
2. Select the Waitlist button
3. On the drop-in page, select the Waitlist Button
DROP-IN PROGRAMS
4. Select the registrant you would like to waitlist
5. Select the Waitlist Button
6. The registrant is now on the waitlist. You will receive an email if a spot becomes available
Navigating your ENCORE account
Navigate to ENCORE at perfectmind.com
Enter your email and password, then click ‘Login’
Note: If you don’t have an account, please see Create an Account and Adding Family Members above
Once logged in, you will be directed to your account profile
To view upcoming programs/events that you and your account members are registered in, scroll to the bottom of your account profile and select ‘Schedule’. Select the box next to an account member’s name to view their schedule
Select ‘Export to PDF’ to download a PDF/printable version
Activity Outcomes
1. To view your activity outcomes (pass or fail), scroll to the bottom of your account profile and select Activity Outcomes
Note: If there are multiple members attached to your account, you will need to select your name from the list when you are logged in to go to your profile
Top Navigation Bar
1. Back to Client List: Select to navigate back to the client list of all members on your Select a name from the list to go to their profile
2. Edit: Select to edit your account. Note: You will not be able to edit your birthday or email. If either of these need to be changed, please contact our Customer Service staff
3. Manage Login: Select to change your password
4. Add Family Member: Select to add additional family members to the account
5. Invoices: Select to view or pay any past, current, and future invoices
– It will automatically pull all scheduled and active invoices however using the filtering options on the left-hand side allows you to pull your terminated and completed invoices as well
– You can search by invoice #, contract # or other keywords
– To pay an invoice, select the checkbox next to it (invoices in red are past due), then select Make Payment
– Enter your credit card information, then select Complete
Schedule
Attendance History
1. To view your attendance history, scroll to the bottom of your account profile and select Attendance History
Transactions
1. To view your transactions, scroll to the bottom of your account profile and select Transactions. Click on the transaction to view additional details
Financial Info
1. To view your financial info, scroll to the bottom of your account profile and select Financial Info
2. Select New to add a credit card number on file. You can set this as your default credit card and/or attach it to all account members’ profiles
3. Note: Once a card has been added, you will not be able to make changes Please contact our Customer Service Staff to edit the details
On your ENCORE account, navigate to the “Attendances” section. Courses that are displayed as “Waiting” under the “Status” column are the courses you’re currently waitlisted on.
Frequently asked questions about ENCORE
I received an email from communication@perfectmind.com. Is it from Norfolk County?
The email communication@perfectmind.com is not spam, it is from Norfolk County and contains your temporary password.
I forgot my password. How do I reset it?
Visit norfolkcounty.perfectmind.com and click on the “Forgot your password?” link. Follow the steps to reset your password.
The password reset email from our vendor (communication@perfectmind.com) will be sent to you. Please check your junk mail folder if you do not see the email in your inbox.
Is my credit card information secure?
Yes. Encore’s software and payment processor are fully encrypted and compliant to ensure your personal information is secure. We strongly encourage our users to choose a strong password and to be diligent in protecting their personal information and account details.
Do I have to register online or are there alternative methods I can use?
You can also register by contacting our Customer Service staff at 519-426-5870 or 226-NORFOLK, extension 2233 or by emailing recreation@norfolkcounty.ca.
Can I access Encore from any computer, tablet or phone?
ENCORE can be accessed from any device that has access to the internet, including your computer, tablet or phone, whether it be Microsoft, Android, or Apple technology.
The system will operate in any internet browser; however, Google Chrome is recommended to ensure you can access all features.
Can I manage my own information on ENCORE?
Yes, one of the features of this new system is that you can see and manage your own information. This includes adding family members, changing your contact information, adding a credit card to your account for easier checkout, managing your own login, and seeing a schedule of the programs you are registered in.


